| Pattern Machine 3D Earth Tutorial sartori-software.com 2010 all rights reserved |
||||||
|
||||||
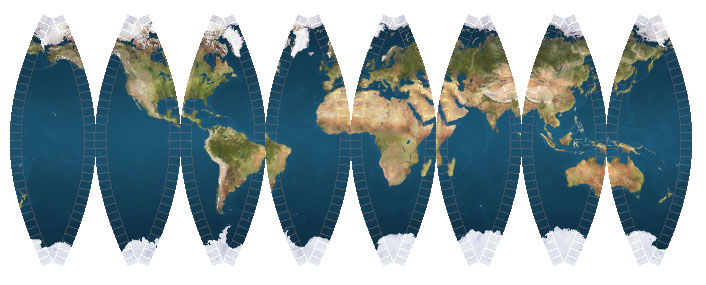
| Scope of this Tutorial is to show how to create a fully textured Earth Slice Pattern. | ||||||
|
Earth Slice Pattern - Scale 1:3,5
|
||||||
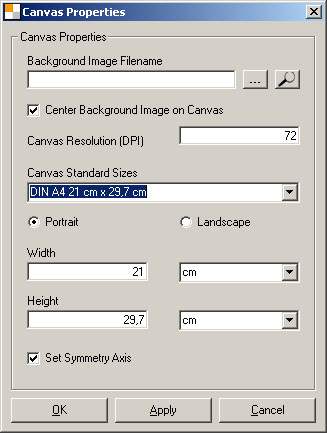
| First of all we need to Setup a new File. Detail Info | ||||||
| File Setup
Start Pattern Machine 3D Click on New File Click OK when done |
|
|||||
| |
||||||
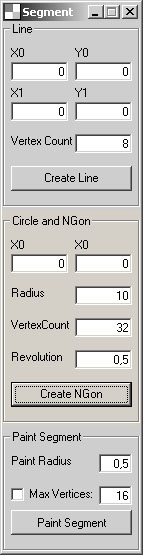
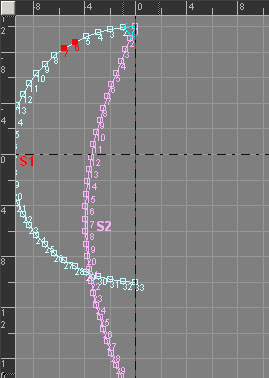
| We need to design our Object outline - We will use a semi Circle for this purpose. Detail Info | ||||||
| Outline Design
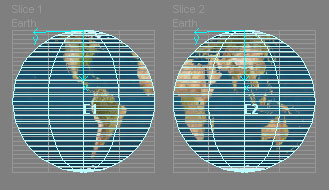
Set the Canvas Origin on Symmetry Axis Click Create Segments Click on Create NGon when done Now we have the outline Segment S1 of our sphere - we need to create the slice outline for the Sphere, or in other
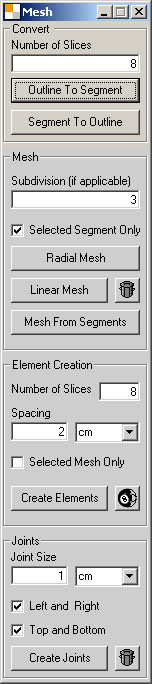
words we must flatten the 3D sphere to a 3D pattern Toggle the Symmetry Axis Mode Select Segment Vertices of S1 and click Mesh Options In the Convert Section Click Outline to Segment. The Number of Slices value gives us the number of slices we want to cut the Sphere into.
|
Create Circle
|
Convert Outline to Segment
|
3D Sphere and 3D Pattern Outline
|
|||
| |
||||||
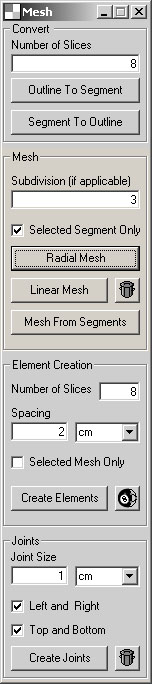
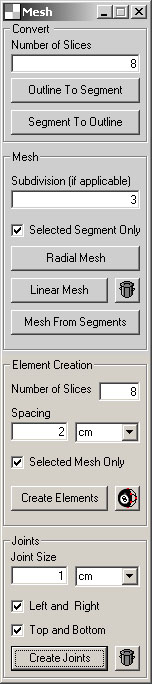
| Once we have our Object Outline we can create the Mesh. Detail Info | ||||||
| Create Linear Mesh
Select one or more Vertices of Segment S1 In Mesh Options Window - Mesh Section click Selected Segment Only Click on Linear Mesh Button 3D Mesh of Object is created The Subdivisions value gives us the meridian count of the Object we want to create. Create Radial Mesh Select one or more Vertices of Segment S2 Click on Radial Mesh Button Pattern Mesh M2 of Object is created |
Mesh Options
|
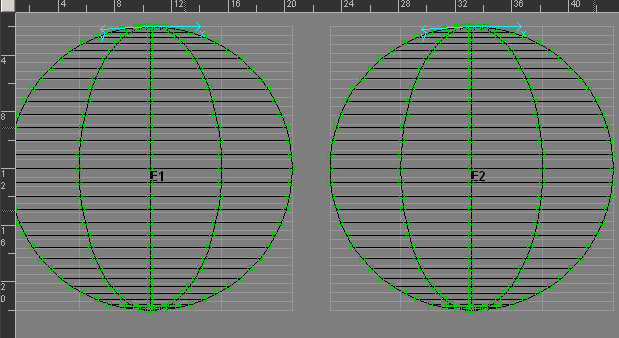
3D Sphere and 3D Pattern Mesh
We have now the Mesh of our 3D Sphere (M1) |
||||
| |
||||||
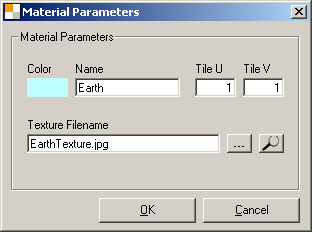
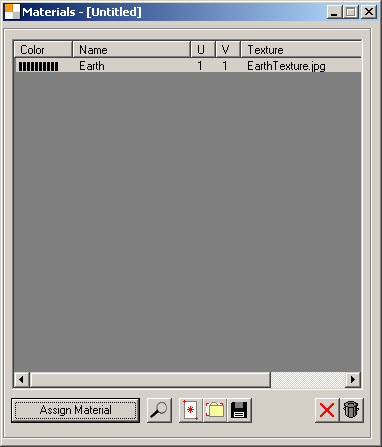
| The Mesh defining the geometry of our Object is designed, now we need to define the Material and Texture. Detail Info | ||||||
| Display Material Editor
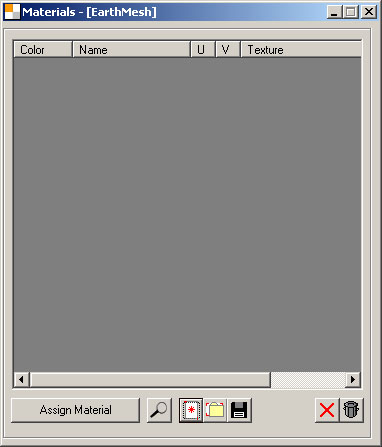
Click Menu Add Material In the Materials Window Configure the Material Parameters Use the File EarthTexture.jpg in Tutorials/Images Folder Notes Materials are defined on a per File basis.
|
Material Parameters
|
Materials Window
|
||||
| Once we have our Object Mesh and Materials we can proceed to slice the pattern to Elements. Detail Info | ||||||
| Create Object Preview
Select one or more Vertices of Mesh M1 In Mesh Options Window, Element Creation Section Set Number of Slices = 2 (front and back) Define spacing if desired Click Create Elements Create Object Element Pattern Select one or more Vertices of Mesh M2 Set Number of Slices = 8 Define spacing if desired Click Create Elements In Mesh options Window define |
Mesh Options
|
|||||
|
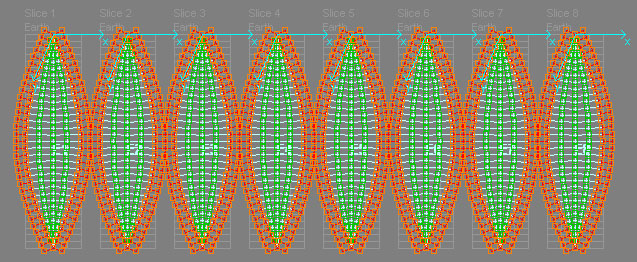
Elements: 3D Object Preview (front an back) created from Mesh M1
|
||||||
|
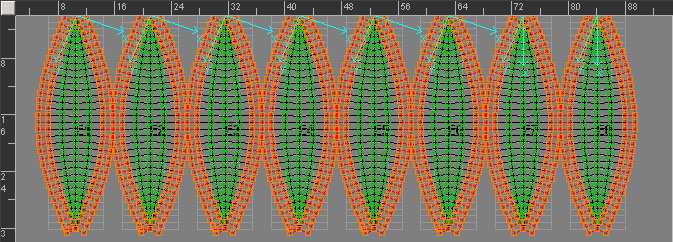
Elements: Object Element Pattern with 1 cm Joints (seam allowance) created from Mesh M2
|
||||||
| The Elements have been created and Materials have been defined. We assign now the Earth Material to the Earth Elements. Detail Info | ||||||
Assign Material
Rendering Element Preview
|
Materials Window
|
|||||
|
Elements: Earth Material assigned
|
Elements: Element Rendering Preview
|
|||||
|
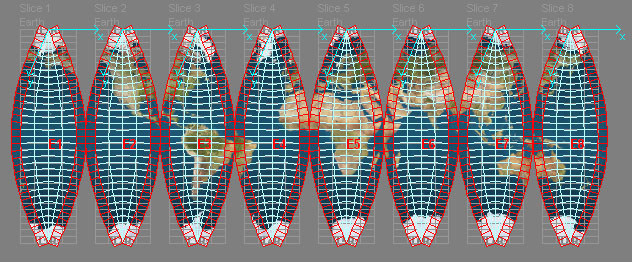
Elements: Object Slice Pattern with Material Earth assigned
|
||||||
|
Elements: Object Slice Pattern Element Rendering Preview
|
||||||
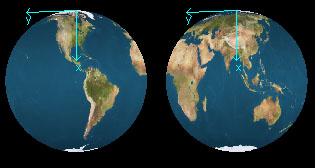
| We reached the final step of this Tutorial. We have designed our Object,
created and textured Elements. We want now render the Slice Pattern to a large sized, High Quality Image File for printing. Detail Info |
||||||
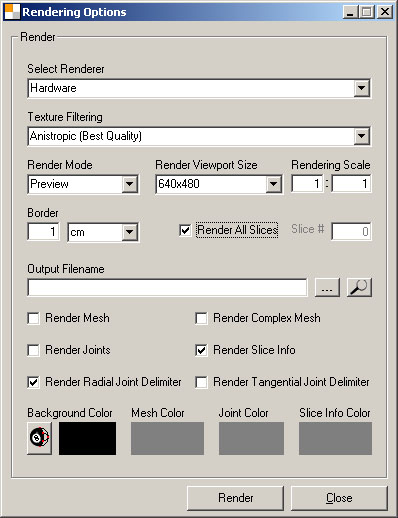
| Preview Rendering Options
Click Rendering Options Configure Preview Rendering Options as shown aside. Click Render
|
Preview Rendering Options
|
|||||
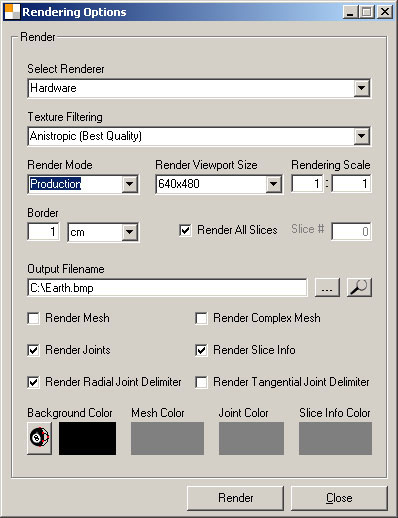
| Production Rendering Options
Configure Production Rendering Options as shown aside. Click Render
The Production Rendering Output will be saved to following Files: C:\Earth0001.jpg,..,C:\Earth0008.jpg
|
Production Rendering Options
|
|||||