| Pattern Machine 3D Beer Bottle Tutorial sartori-software.com 2010 all rights reserved |
||
|
||
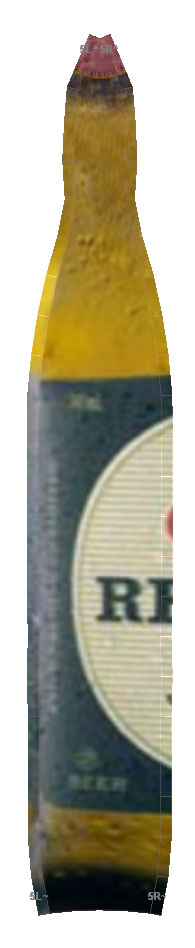
| Scope of this Tutorial is to show how to create a fully textured Beer Bottle Slice Pattern. | ||
|
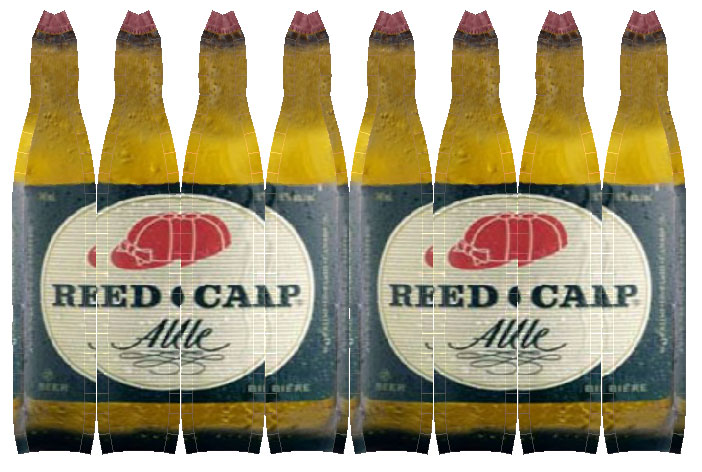
Beer Bottle Slice Pattern - Scale 1:1
|
||
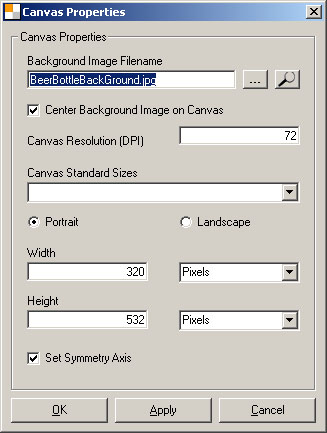
| First of all we need to Setup a new File. Detail Info | ||
| File Setup
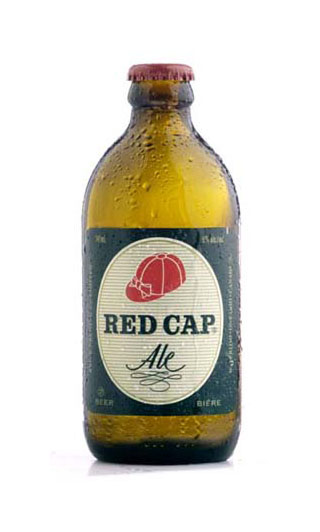
Start Pattern Machine 3D Click on New File Use the Beer Bottle Image Click OK when done
|
|
BeerBottleBackground.jpg
|
| |
||
| We need to sample our Object outline - We will use the Pattern Sampler for this purpose. Detail Info | ||
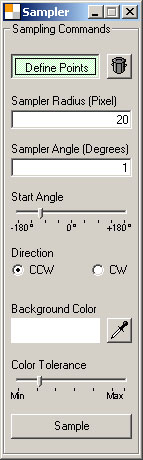
| Outline Sampling
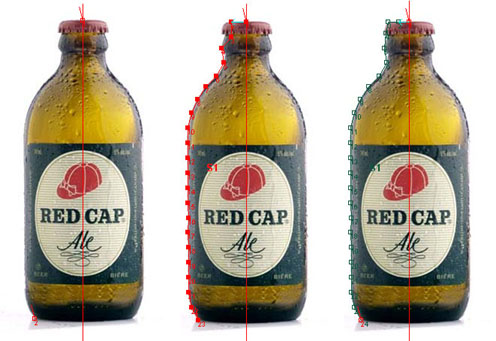
Display the Pattern Sampler: Configure parameters as Define start- and endpoint In Pattern Window Adjust Vertices as
|
Pattern Sampler Beer Bottle: start- and endpoint, Sampled Outline, Adjusted Outline
|
|
| |
||
| Once we have our Object Outline we can create the Mesh. Detail Info | ||
| Hide Background Image
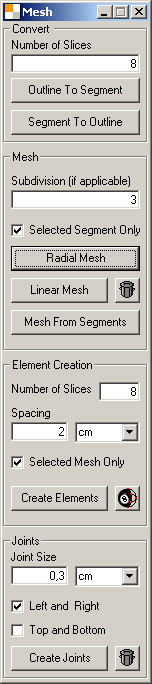
Menu View > Background Create Linear Mesh Select one or more Vertices In Mesh Options Window - Click on Linear Mesh Button 3D Mesh M1 of Object is created The Subdivisions value gives Create Radial Mesh Select one or more Vertices of In Mesh options Window - Select one or more Vertices Click on Radial Mesh Button Pattern Mesh M2 of Object is created |
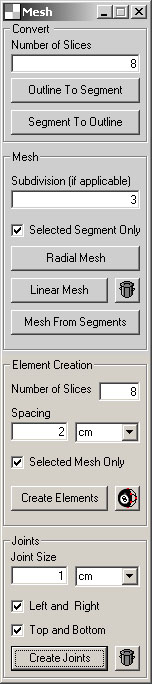
Mesh Options
|
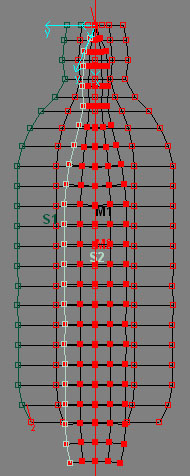
3D Bottle and 3D Pattern Mesh
We have now the Mesh of our 3D Bottle (M1) |
| |
||
| The Mesh defining the geometry of our Object is designed, now we need to define the Material and Texture. Detail Info | ||
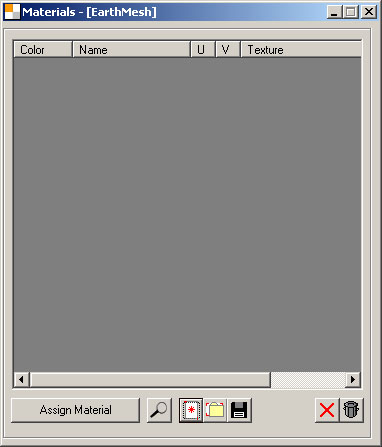
| Display Material Editor
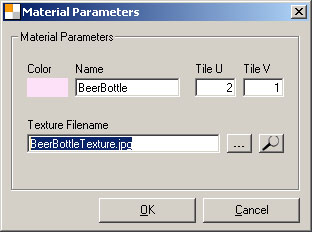
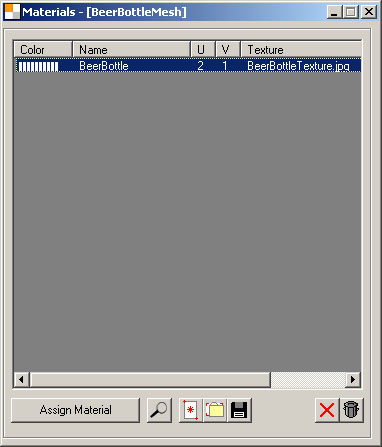
Click Menu Add Material In the Materials Window Configure the Material Parameters Use the File BeerBottleTexture.jpg in Notes Obviously you can split You can then assign a Material to each Sub-Object. |
Material Parameters
|
Materials Window
|
| Once we have our Object Mesh and Materials we can proceed to slice the pattern to Elements. Detail Info | ||
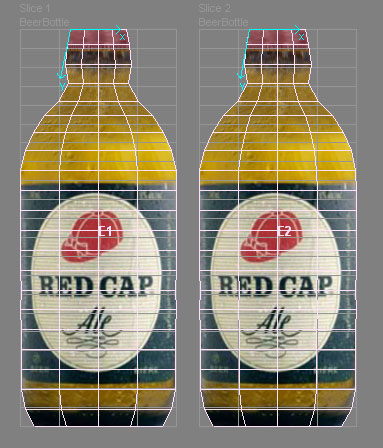
| Create Object Preview
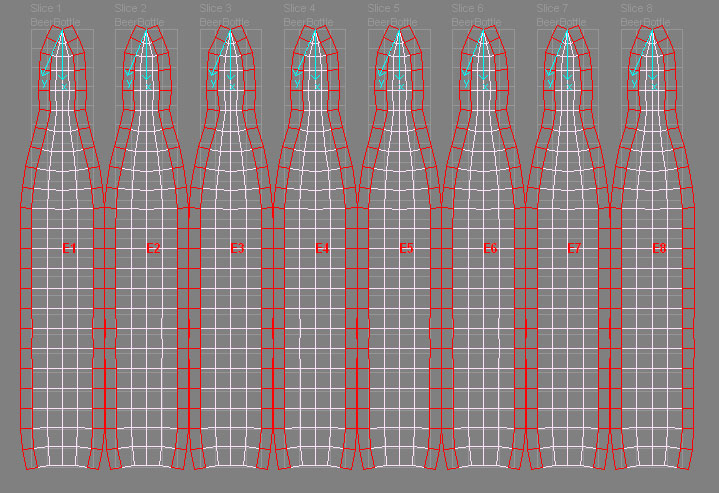
Select one or more Vertices of Mesh M1 In Mesh Options Window, Element Creation Section Set Number of Slices = 2 (front and back) Define spacing if desired Click Create Elements Create Object Element Pattern Select one or more Vertices of Mesh M2 Set Number of Slices = 8 Define spacing if desired Click Create Elements In Mesh options Window define |
Mesh Options
|
|
|
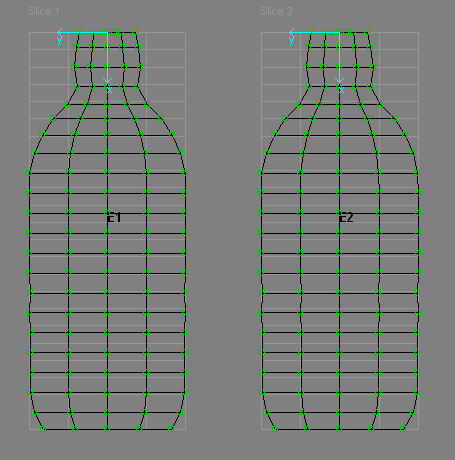
Elements: 3D Object Preview (front an back) created from Mesh M1
|
||
|
Elements: Object Element Pattern with 0,3 cm Joints (seam allowance) created from Mesh M2
|
||
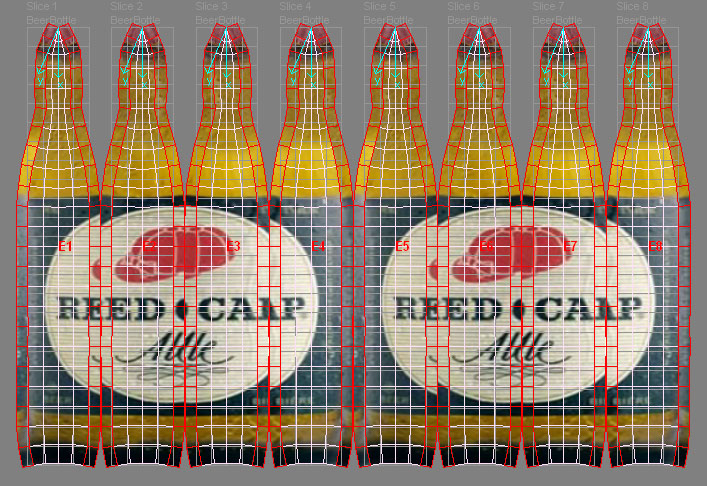
| The Elements have been created and Materials have been defined. We assign now the Beer Bottle Material to the Beer Bottle Elements. Detail Info | ||
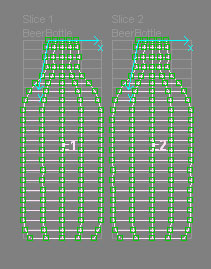
| Assign Material
Select the Elements you want In the Materials Window Select Rendering Element Preview To Render a Viewport Preview |
Materials Window
|
|
|
Elements:
|
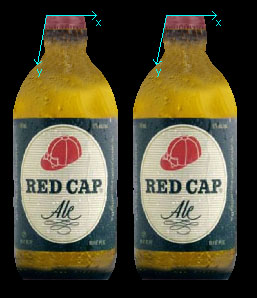
Elements: Element Rendering Preview
|
|
|
Elements: Object Slice Pattern with Material Beer Bottle assigned
|
||
|
Elements: Object Slice Pattern Element Rendering Preview
|
||
| We reached the final step of this Tutorial. We have designed our Object,
created and textured Elements. We want now render the Slice Pattern to a large sized, High Quality Image File for printing. Detail Info |
||
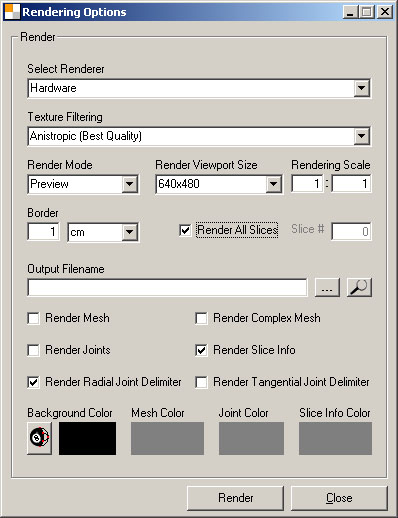
| Preview Rendering Options
Click Rendering Options Configure Preview Rendering Options as shown aside. Click Render
|
Preview Rendering Options
|
|
| Production Rendering Options
Configure Production Rendering Options as shown aside. Click Render
The Production Rendering
|
Production Rendering Options
|
|